In many cases (packaging, catalogs, flyers, newspapers, ...), digital printing is no longer sufficient, and it is necessary to use "offset" printing.
The offset printing is a CMYK printing process during which 3 elementary colors (cyan (blue), magenta (red), and yellow), as well as the black, are applied separately on the paper as this one circulates between the rollers of the printing factory. The superposition of these three elementary colors and the black finally makes it possible to obtain a broad range of colors.
The advantage of the offset is mainly its much better value for money for a big edition (a considerable number of copies). It also makes printing on many mediums (cardboard, polymer, etc.) and uses Pantone inks for optimal color accuracy.
When offset printing is justified, it is necessary to pay particular attention to the files that must respect a certain number of rules (CMYK, etc.). Among them, trapping and overprinting are two important but poorly understood and used concepts.

A) Trapping
A defect in the alignment of the plates in the printer can produce white areas on the final print at the intersection of the colors.
Therefore, the idea is to anticipate this defect beforehand by forcing certain object borders to slightly overlay / trap the object next to them or the background.
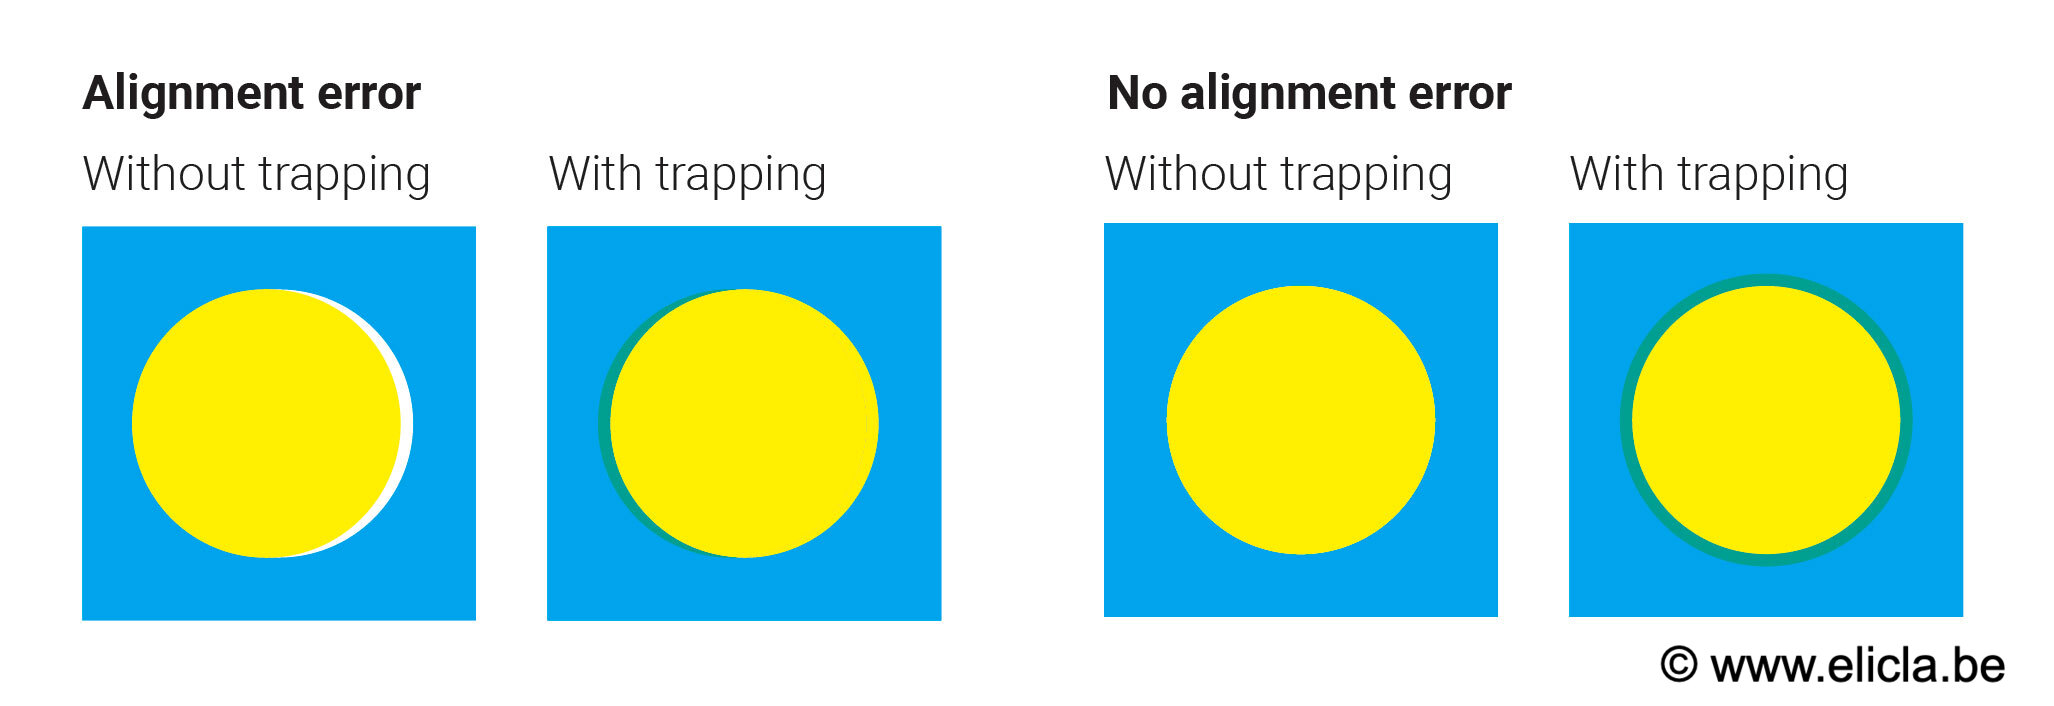
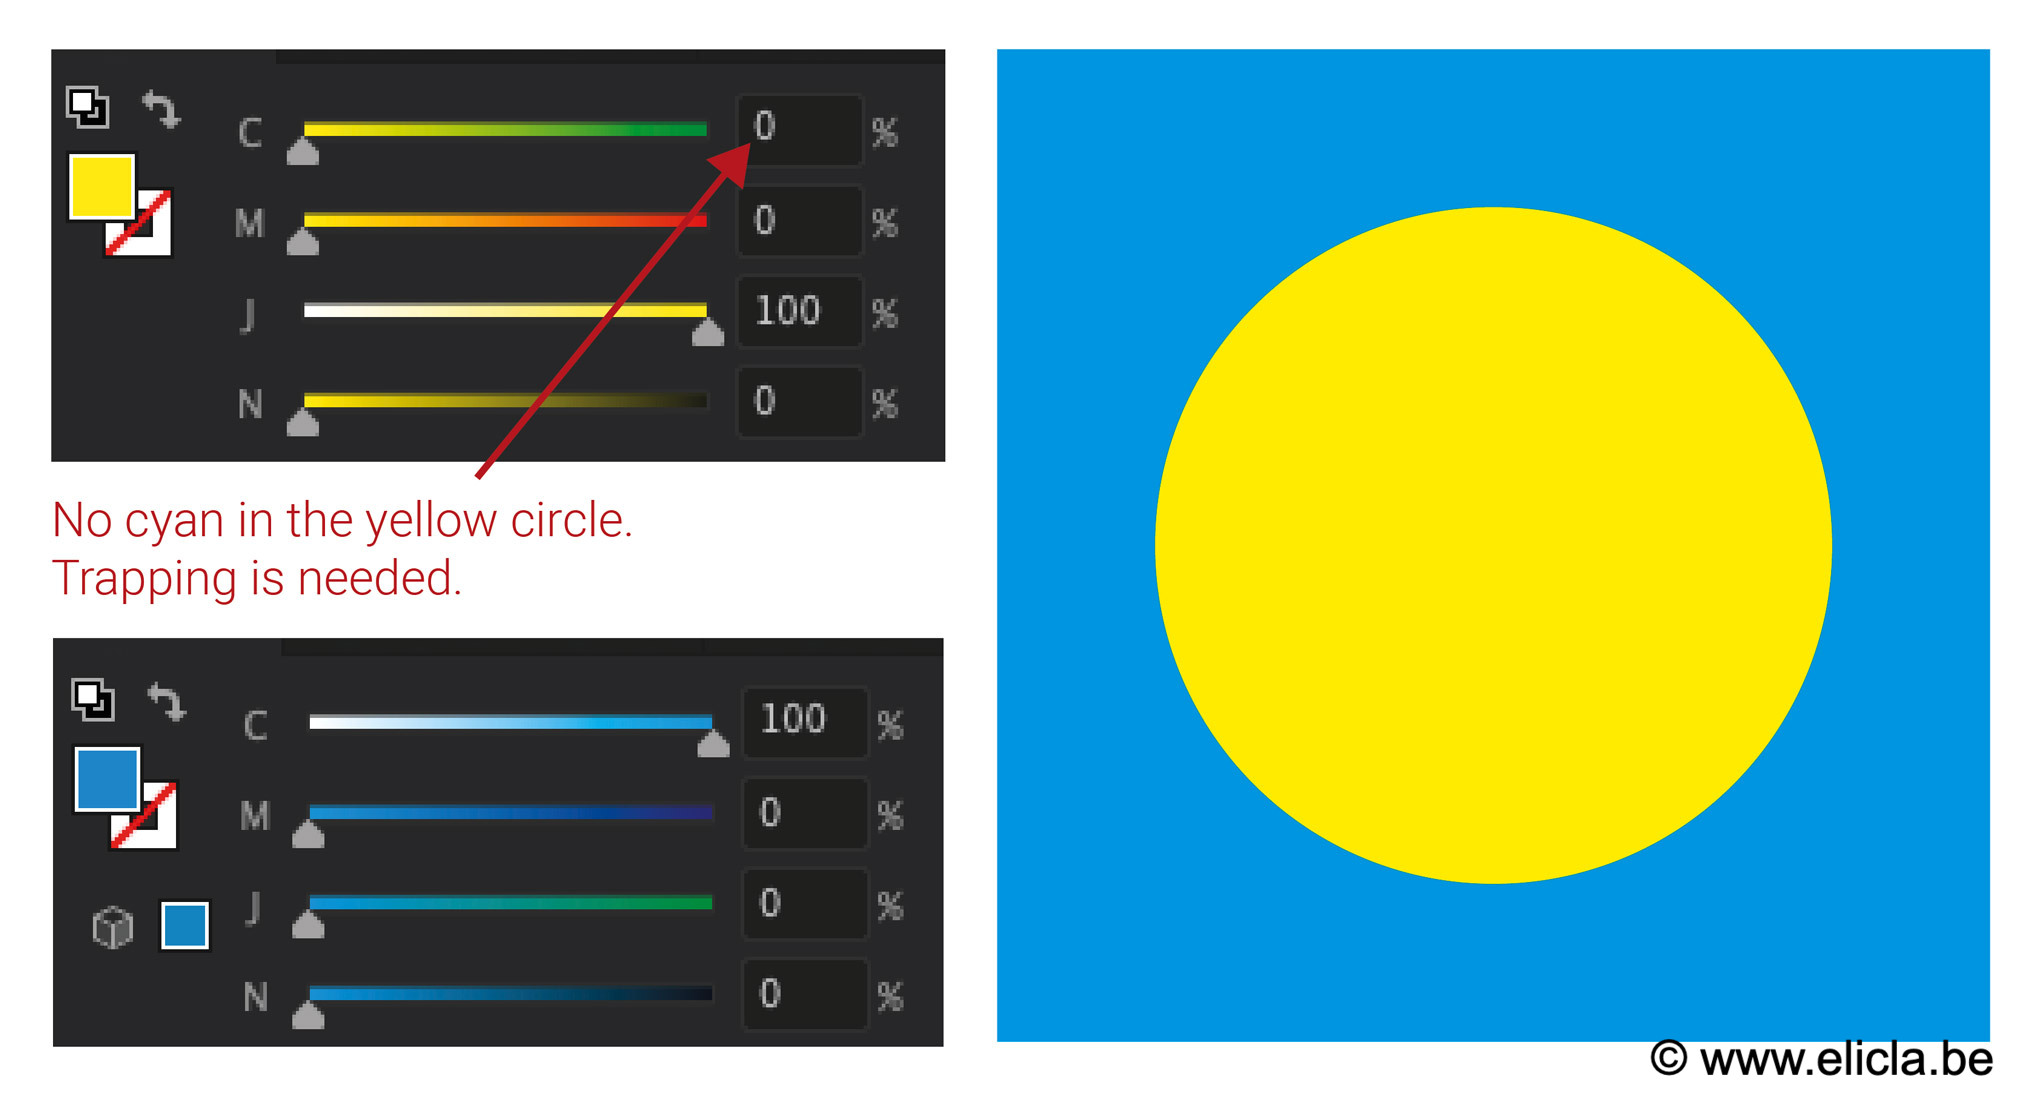
The trapping (overlay) is not always necessary and depends on the document to be printed. As this last is in quadrichromy, the colors of are a mixture of cyan, magenta, yellow and black. When two objects superimposed in the document have a common color, it is useless to define a trap because it is carried out by itself. If the two objects have a yellow tint in common, this tint automatically fills any space, error of alignment between the colors.
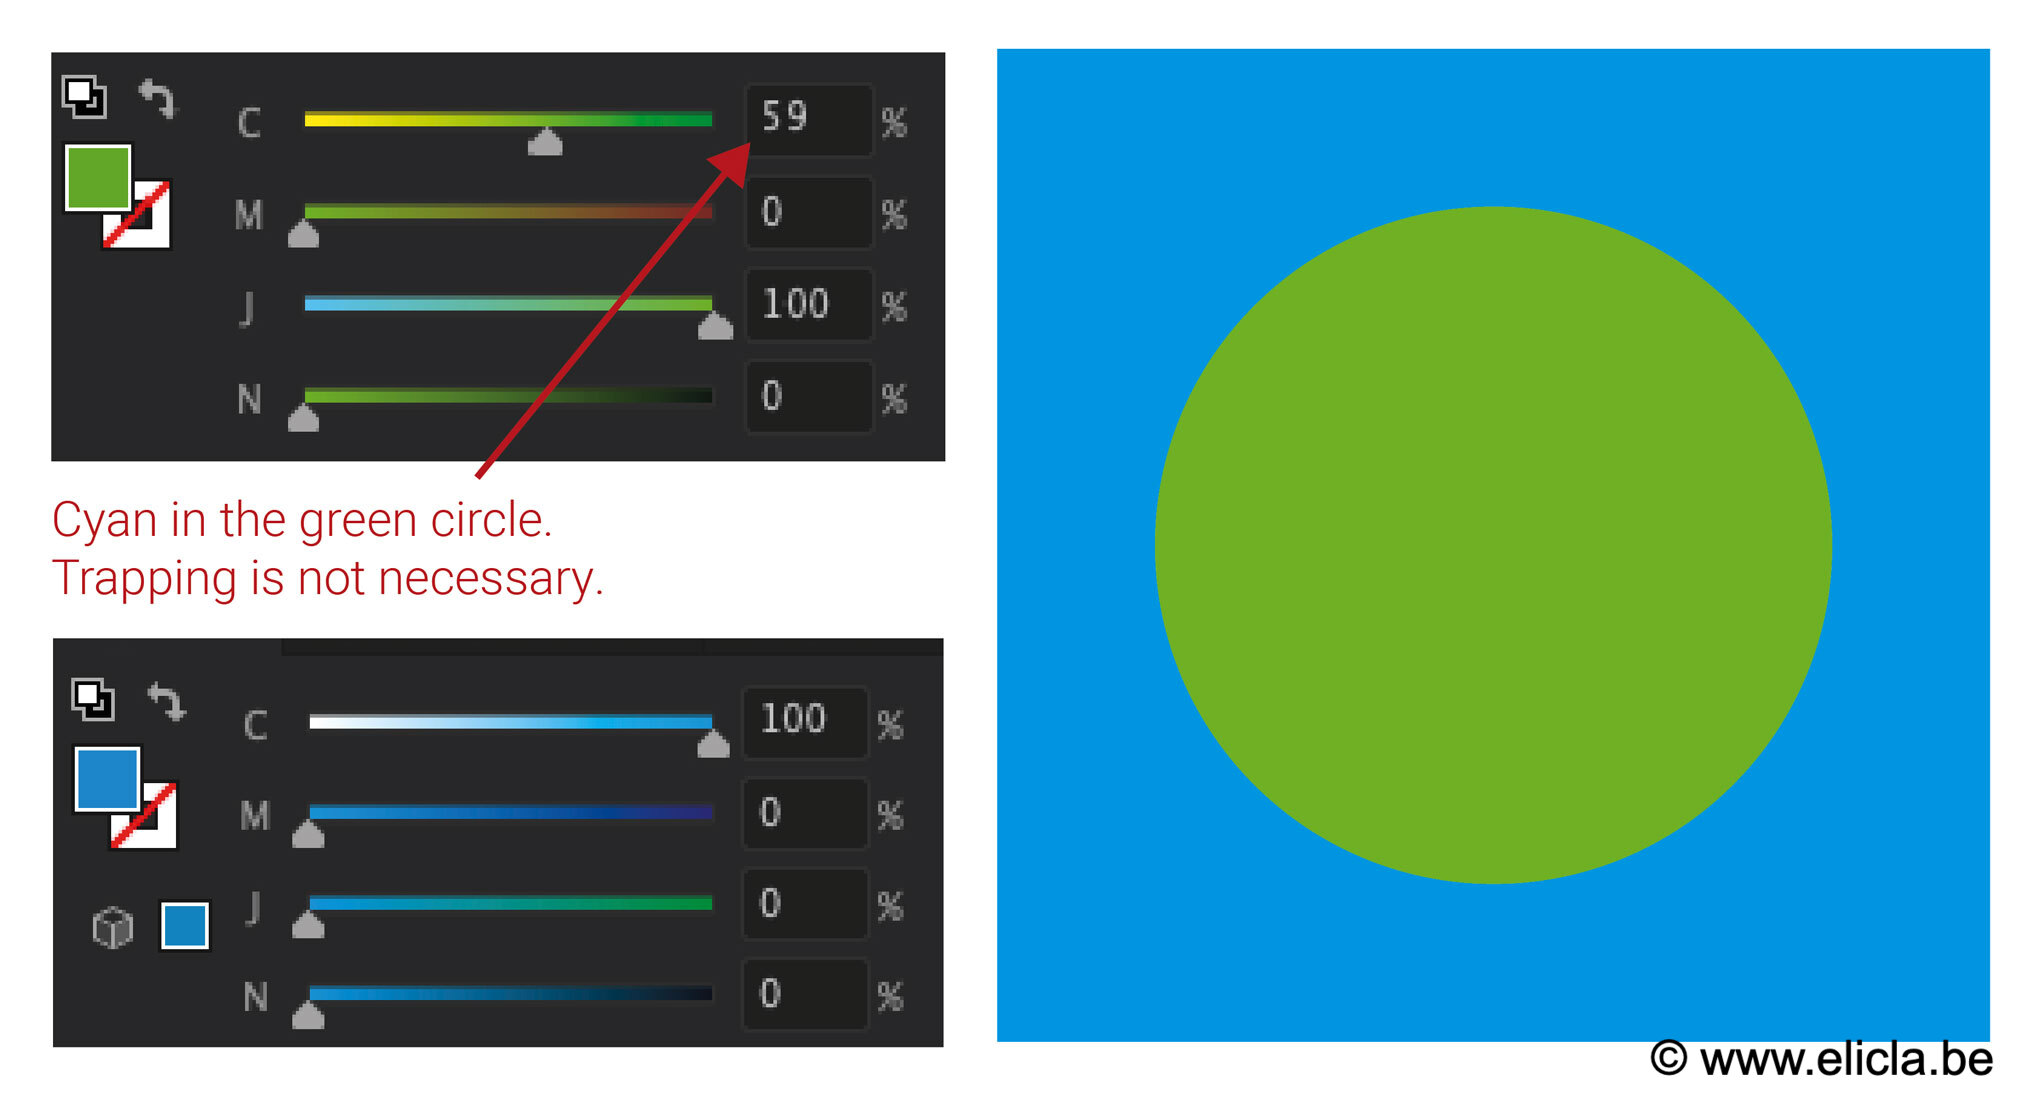
On the other hand, when the two objects on top of each other have very different colors with little shade in common, it is recommended to apply a trap / overlay.
A.1) Trapping in Illustrator CC
To apply a trap in Illustrator, you must first make sure to :
- Put the two objects on the same layer
- Select them and put them in the same group
Then, with the group selected, go to the menu Effect => Pathfinder => Trap
Even if Illustrator applies a default thickness of 0.25 points (which is sufficient for most printers), I advise you to ask your printer directly for the optimal settings.
A.2) Trapping in Photoshop CC
In Photoshop, it is also possible to apply a trap. Be careful that the manipulation will result in the merging and flattening of the layers. With the layers selected, go to Image => Trap, and apply the desired trap size.
A.3) Trapping in InDesign CC
InDesign, the trapping also exists, but the handling is less intuitive than in Illustrator and Photoshop. Predefined traps can be applied to pages that will only be visible when printed. To view and change these "predefined traps", go to Window => Output => Trap Presets
B) Overprinting
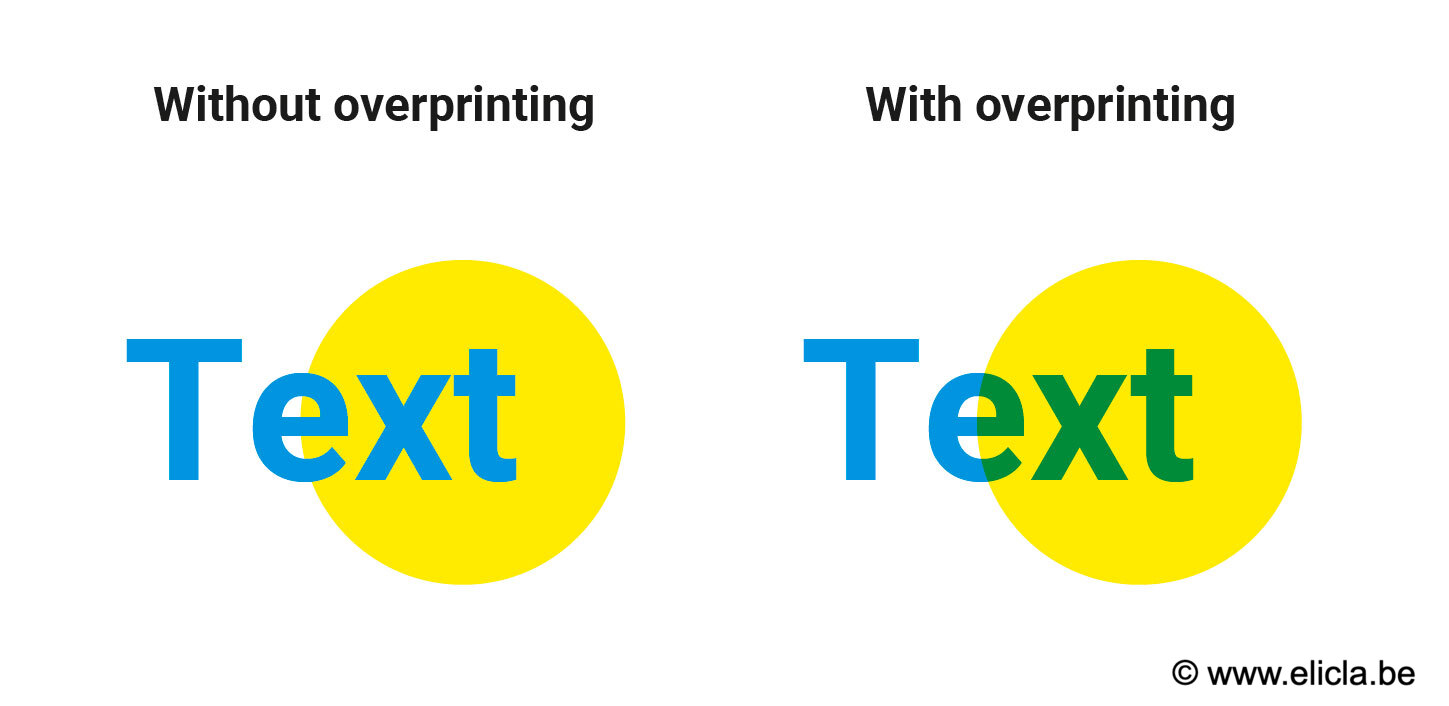
The overprint is, as its name indicates, a print that comes on top of the rest, last. It is generally used with the text to avoid that this one "pierces" the color on which it is and that the slightest alignment error would make it illegible. The trapping method could be used, but this method is unsuitable in the case of text with fine lines. With dark text (usually black), the overprint method is used.
B.1) Overprinting in Illustrator CC
By default in Illustrator, overprinting will only be visible when printing. To simulate the effect of a color that is superimposed on another, it is possible to activate a preview in View => Overprint Preview
For all types of objects
Select the objects to be overprinted. Select background overprint, outline overprint, or both in the panel "Object options".
For black text and objects
To overprint all black objects (100%), you can use the "Black overprint" command.
- Select all objects to be overprinted
- Edit => Change Colors => Black Overprint
- Enter the minimum percentage of black to overprint
- All objects that have this percentage will be overprinted
- Choose between background and/or outline overprinting
- To overprint all four colors, select the option "Black with CMY"
- To overprint spot colors (color that is already a specific mixture of CMYK (e.g. Pantone) select the option "Black with spot colors".
Trapping by contour overprinting
This is a manual option mostly used in older versions of Illustrator. First of all, you need to apply an outline to the object (in the foreground) of the same color as the object in question. Then, in the "Object Option" panel, check the "Outline Overprint" box, to overprint the outline of the object on the background. This will have the effect of slightly overlaying the object/background in the background and preventing white space in case of misalignment.
B.2) Overprinting in Photoshop CC
In Photoshop, it is also possible to overprint black text or objects.
- Select the black text to be overprinted
- Make sure it is 100% black and does not contain any other colors
- In the layers panel, select the "Product" option to superimpose this layer on the rest
B.3) Overprinting in InDesign CC
For all types of objects
Select the objects to be overprinted. As in Illustrator, the overprinting of objects is managed in the "Object Options" panel. To display it, select Window => Output => Object Option
For black text and objects
By default, InDesign takes care of overprinting black texts and objects (as long as they are "pure", i.e., 100% black). In the "color chart" panel, the color named [Black] is pure and will be overprinted.